Image Studio Pro – Live Preview & Editor
Edit images instantly with our Free Advanced Image Studio. Features live preview for contrast, brightness, exact pixel resizing, and 1-click web optimization.
Table of Contents
A folder of photos that are too big to email or the wrong format for a form? Compress, convert, resize, and crop them here, one at a time or as a batch you download as a zip. It handles the routine image chores without a heavyweight editor and without an upload.
Advanced Image Studio Pro
All-in-one image compress, convert, crop, filter, overlay, social presets & bulk ZIP export. 100% offline, zero external libraries.
📊 Live QC Panel
Live Preview Before You Commit
Every slider — brightness, contrast, blur, vignette, border, text overlay — updates the preview instantly. The QC panel on the right shows the estimated output file size and a web-readiness score as you type, so you know whether a 2 MB photo will land under 500 KB before you export it, not after.
12 Social Media Size Presets
One click fills in the exact pixel dimensions for Instagram posts and stories, YouTube thumbnails and channel art, Facebook covers, LinkedIn banners, X headers, WhatsApp DPs, and Pinterest pins. No more guessing whether a YouTube thumbnail is 1280×720 or 1920×1080, or hunting for a size chart in another tab.
Bulk ZIP Export, Zero Libraries
Drop in 30 photos, set your export rules once, and download every processed file as a single ZIP. The ZIP is assembled byte-by-byte in your browser using a built-in encoder — no JSZip, no CropperJS, no CDN calls. Once the page loads, the tool keeps working even if your connection drops.
How to Use Advanced Image Studio Pro
Load Your Image
Drag an image onto the drop zone, click to browse, or hit Load Sample Image to try the tool immediately. Select multiple files at once to switch straight into Bulk mode.
Set Size and Format
In Export & QC, type exact pixel dimensions (the lock keeps the aspect ratio), or open Social Presets and click a platform. Pick WebP, JPEG, or PNG and set the quality slider.
Edit and Refine
Crop by dragging a box on the canvas, rotate or flip, adjust colour, add a border or text overlay, or knock out a flat background in Chroma Key. The preview follows every change.
Export
Click Apply & Export for a single image, or Process All & Download ZIP for a batch. Use 1-Click Web Optimize to jump straight to WebP at 85% quality capped at 1200px wide.
Last updated: July 2026
🔴 WebP, JPEG or PNG? Pick Once, Save Megabytes
The format dropdown is the single biggest lever on your final file size, and most people leave it on the wrong setting. Here is the decision in plain terms.
Choose WebP for anything going on a website. At the same visual quality, WebP files typically land 25–35% smaller than JPEG. A 1.8 MB product photo that becomes a 240 KB WebP loads noticeably faster on mobile, and every modern browser has supported it for years. This is why the 1-Click Web Optimize button forces WebP at 85% quality — that combination is the sweet spot where most people cannot see the difference from the original, but the file has shrunk by roughly 80%.
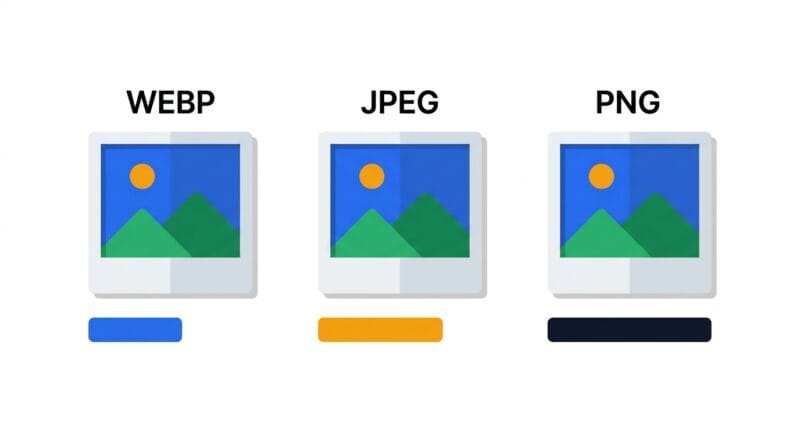
Choose JPEG when something downstream refuses WebP. Older email clients, some print shops, a few marketplace upload forms, and certain legacy CMS installs still reject it. JPEG is the safe universal photo format. Note that all 12 social presets default to JPEG for exactly this reason — Instagram and LinkedIn re-encode your upload anyway, so handing them a clean JPEG avoids a double-conversion.
Choose PNG only when you need transparency or pixel-exact fidelity: logos, icons, screenshots with sharp text, or any image you just ran through Chroma Key. PNG is lossless, so it does not blur text edges — but it is also the largest of the three by a wide margin. Exporting a photograph as PNG will often produce a file bigger than the original. The quality slider disappears when you select PNG because lossless compression has no quality dial to turn.
🟡 What the Quality Slider Is Actually Doing
Quality is not a percentage of “how good the image looks.” For WebP and JPEG it controls how aggressively the encoder discards fine detail that the human eye tends not to notice — mostly subtle colour variation in smooth areas like sky, skin, and shadow.
- 🔵 90–100: Near-invisible loss, but file size climbs steeply. Only worth it for hero images or photography portfolios where detail genuinely matters.
- 🟠 80–90: The practical default. At 85, most photos are indistinguishable from the original at normal viewing size while being a fraction of the weight. This is where the tool starts.
- 🟣 Below 70: Blocky artefacts appear around high-contrast edges — text, logos, tree branches against sky. Fine for a thumbnail nobody zooms into; visibly bad for anything a reader will look at closely.
The important habit: resize before you reduce quality. Dropping a 4000px-wide photo to 1200px cuts the pixel count by roughly 90% on its own — a far bigger saving than crushing quality down to 50 while keeping it oversized. Get the dimensions right first, then reach for the quality slider only if the QC panel still shows a large estimate. If you want to work out the raw uncompressed numbers behind any resolution, the Data Capacity Calculator does the bit-depth maths for you.
🟢 Reading the QC Panel
The estimate in the sidebar is a projection, not a measurement — it scales the original file size by the change in pixel area and applies a per-format multiplier. It is deliberately conservative and usually lands within about 20% of the real output, which is close enough to catch a problem before you export. The web score turns green when the format is WebP, the estimate is under 500 KB, and the width is 1920px or less; those three conditions together describe an image that will not drag down a page’s load time. If the score says Poor, the fix is almost always to reduce the width, not the quality.
🔴 Chroma Key vs AI Background Removal — Two Different Jobs
The Chroma Key tab in this tool and the AI background remover elsewhere on the site solve different problems, and using the wrong one wastes time.
Chroma Key works on colour. It walks every pixel, measures how far that pixel’s colour sits from the colour you picked, and makes it transparent if the distance falls under your tolerance. That means it is excellent — and instant — on images with a genuinely flat background: a product shot on white seamless paper, a logo on a solid field, a green-screen frame, a scanned signature. It has no idea what a “person” or a “product” is. It only knows colour distance.
The tolerance slider is the whole game. Too low and you leave a halo of near-white pixels around the subject. Too high and you start eating into the subject itself — white shirts, pale skin, and light hair are the usual casualties. Start around 30, look at the checkerboard showing through the preview, and nudge upward until the fringe disappears but the subject stays intact. The tool switches the output format to PNG automatically after a removal, because JPEG cannot store transparency and would silently fill your new transparent area with black.
AI removal is the opposite approach: a segmentation model that recognises subjects and separates them from cluttered, real-world backgrounds where no single colour dominates. A photo of someone standing in a park will defeat Chroma Key completely and is exactly what the AI Image Eraser is built for. Rule of thumb: if you can name the background colour in one word, use Chroma Key here. If you cannot, use the AI tool.
🟡 Getting Bulk Mode Right
Bulk mode applies the export settings — dimensions, format, quality, border, and text overlay — to every file in the queue. It does not apply per-image edits: a crop you drew on the first photo will not be replayed onto the other twenty-nine, because a crop box that makes sense on one composition rarely makes sense on another.
This has a practical consequence worth knowing before you queue up fifty files. If every image in the batch is the same aspect ratio — a folder of product shots from one shoot, for example — a single set of export dimensions works cleanly. If the batch mixes portrait and landscape, forcing a single width and height on all of them will stretch some. In that situation, set the width and unlock the aspect ratio only if you truly want a uniform canvas; otherwise process the orientations as two separate batches.
The ZIP itself is built in memory using the STORED method, which means files are packaged without a second layer of compression. That is intentional and correct: JPEG, WebP, and PNG are already compressed formats, so running them through ZIP’s deflate algorithm typically saves under 2% while costing significant processing time. A STORED archive opens normally in Windows Explorer, macOS Finder, 7-Zip, and every other standard tool.
🟢 Borders, Corners and Text Overlays
A few details in the Overlays & Frame tab that are easy to miss:
- 🔵 The border is drawn outside your target dimensions. A 1200×800 export with a 20px border produces a 1240×840 file. The QC panel accounts for this — watch the export size update as you drag the slider.
- 🟠 Rounded corners only survive in PNG and WebP. Export a rounded image as JPEG and the corners fill with your border colour, because JPEG has no alpha channel to make them transparent.
- 🟣 Text overlay font size is in absolute pixels, measured against the export canvas, not the on-screen preview. A 36px label looks prominent on a 400×400 profile picture and nearly invisible on a 2560×1440 channel banner — so re-check the size after switching presets.
Nothing you load here is uploaded anywhere. Every pixel operation runs in a canvas element inside your own tab, which is why the tool works on confidential product shots, client photos, or anything you would not paste into a random web uploader. For a full breakdown of how that works under the hood, read the companion guide on building a secure browser-based image editor, or browse the rest of the free offline tools by category.
Are my images uploaded to a server?
No. Every operation runs in your browser using the Canvas API. Nothing leaves your device, there is no account, and closing the tab discards everything. You can disconnect from the internet after the page loads and the tool still works.
Why did my transparent background turn black after export?
The format was set to JPEG, which has no alpha channel. Switch to PNG (or WebP) in Export & QC. After a Chroma Key removal the tool sets PNG automatically, so this usually only happens if you change the format back manually afterwards.
Chroma Key is eating part of my subject. How do I fix it?
Lower the tolerance. High tolerance removes pixels further from your chosen colour, so white shirts, pale skin, and blonde hair start disappearing along with a white background. Drop it in steps of 5 until the subject is intact, then accept a small fringe rather than losing detail.
How many images can I process in bulk at once?
There is no hard cap, but everything is held in memory, so very large batches of very large photos can strain a low-RAM device. Batches of 20–50 typical web images are comfortable on most machines. Files are processed one at a time in sequence, not all at once.
Why is my PNG bigger than the original JPEG?
That is expected. PNG is lossless and stores photographic detail very inefficiently compared with JPEG or WebP. Use PNG only for transparency, logos, or sharp text. For photographs, WebP will give you a far smaller file at the same apparent quality.
Does the crop tool work on touchscreens?
The crop selection is driven by mouse drag events, so it is designed for a pointer. On a phone or tablet, use the exact width and height fields in Export & QC, or the social presets, to size the image instead.
Will the estimated file size match the real one exactly?
Not exactly. It is a projection based on pixel-area change and a per-format multiplier, typically within about 20% of the actual output. It exists to catch a bad setting before you export, not to be a precise measurement. The real size is whatever the downloaded file reports.
Can I convert an SVG with this tool?
This studio works with raster images (JPEG, PNG, WebP). For vector-to-raster conversion with control over output scale and transparency, use the dedicated SVG to PNG Converter instead.