Advanced Image Studio: Build a Secure Browser-Based Image Editor
Learn how a secure browser-based image editor functions using HTML5 Canvas. Discover offline pixel manipulation, bulk WebP conversion, and secure client-side editing.
Table of Contents
Last updated: July 2026
🔴 The Problem With Uploading Images to Edit Them
The normal way an online image tool works is straightforward and, for a lot of use cases, unacceptable. You pick a file. Your browser posts it to a server somewhere. The server resizes or compresses it, writes the result to disk, hands you back a download link, and — depending on the operator’s retention policy, which you have almost certainly not read — keeps a copy for some period of time.

For a holiday snapshot, fine. For an unreleased product photo, a client’s brand assets under NDA, a scanned document with personal details, or a medical image, that round trip is a genuine problem. The file has left your machine, crossed a network, and landed on hardware you do not control. No amount of “we take privacy seriously” boilerplate changes the fact that the bytes were transmitted.
The alternative is to do the work where the file already is: in the browser. Modern browsers ship with everything needed to decode, transform, and re-encode an image without a single network request. Nothing is uploaded because there is nothing to upload to.
🟡 The Canvas API Does the Heavy Lifting
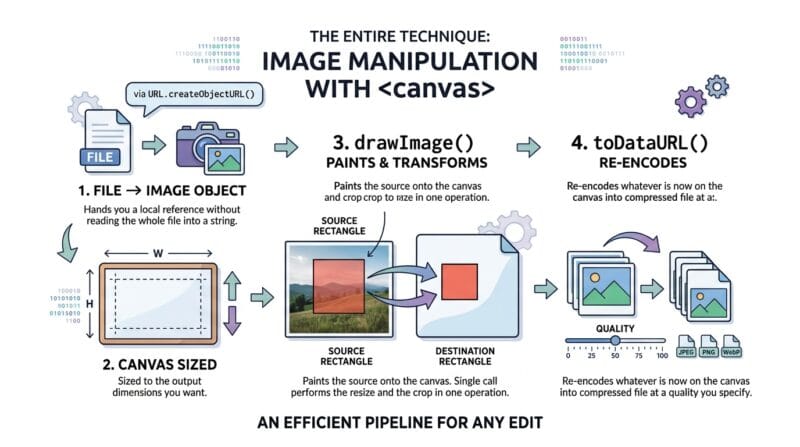
The whole technique rests on one element: <canvas>. It is a drawing surface with a 2D rendering context, and it can read from an image, transform it, and write it back out as a compressed file. The pipeline for any edit is basically four steps.
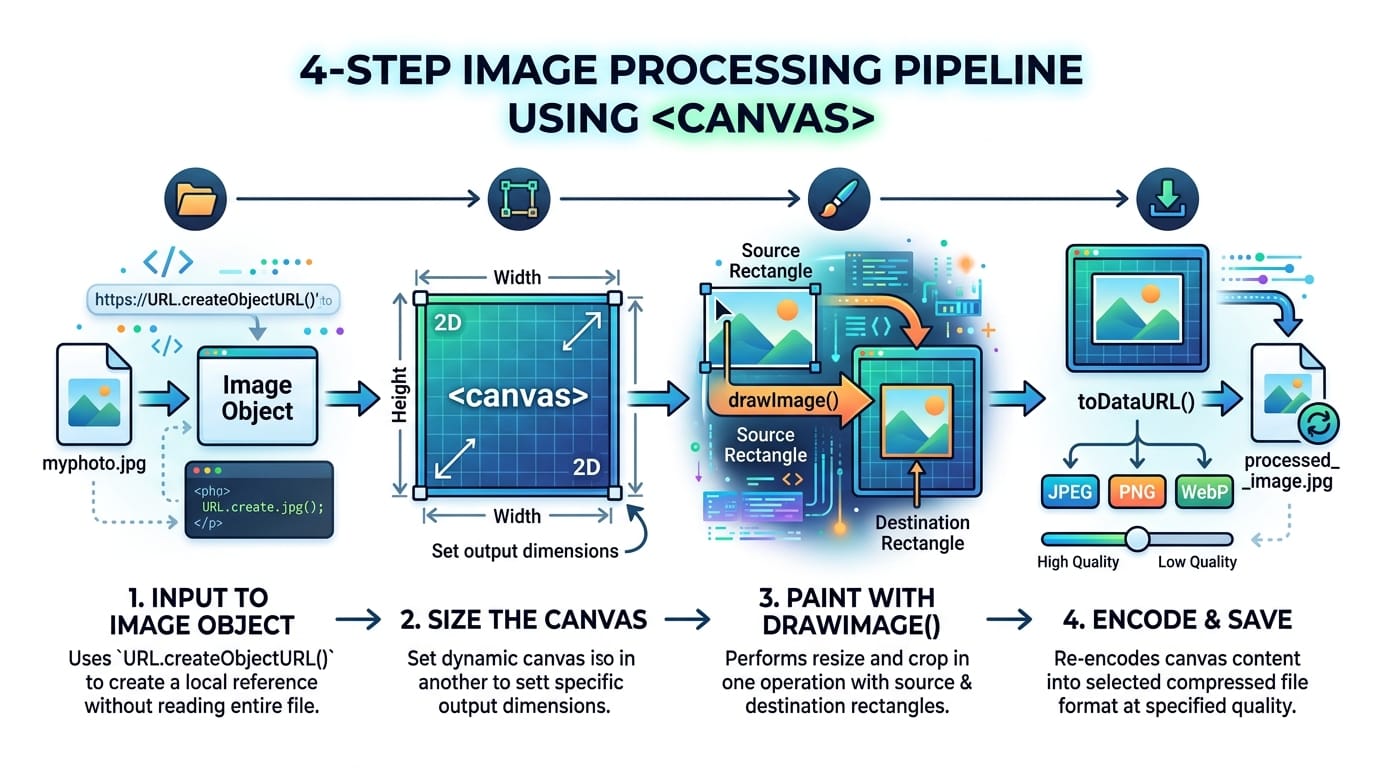
First, the file goes into an Image object, usually via URL.createObjectURL(), which hands you a local reference without reading the whole file into a string. Second, the canvas is sized to the output dimensions you want. Third, drawImage() paints the source onto the canvas — and because drawImage() accepts both a source rectangle and a destination rectangle, this single call performs the resize and the crop in one operation. Fourth, toDataURL() re-encodes whatever is now on the canvas into JPEG, PNG, or WebP at a quality you specify.
Rotation and flipping happen before the draw, by transforming the canvas coordinate system rather than the pixels: translate the origin to the centre, rotate, scale by −1 on an axis to mirror, then draw. Colour adjustments are simpler still — the context exposes a filter property that accepts the same syntax as CSS, so ctx.filter = 'brightness(120%) contrast(90%)' applies to everything drawn afterwards. That is the reason the live preview and the final export can share one code path: the preview sets the same filter string on an <img> element, and the export sets it on the canvas context. What you see is genuinely what you get. The MDN Canvas API documentation covers the full surface if you want to go deeper.
🟢 When You Need the Actual Pixels
Filters and transforms are declarative — you describe the effect and the browser applies it. Some operations need direct pixel access instead, and that is what getImageData() provides: a flat array of bytes, four per pixel, in red-green-blue-alpha order.
Chroma key background removal is the classic example. You loop the array four bytes at a time, treat each pixel’s RGB values as a point in three-dimensional colour space, measure its Euclidean distance from the target colour, and if that distance falls below the tolerance you set the alpha byte to zero — making it transparent. Then putImageData() writes the modified array back. It is a genuinely simple algorithm, which is both its strength and its limitation: it works flawlessly on a flat studio backdrop and fails completely on a photo taken in a park, because it has no concept of a “subject.” It only knows colour distance. That distinction is why a colour-key remover and an AI segmentation model are separate tools rather than one.
🔴 Bulk Export: Building a ZIP With No Library
Processing one image client-side is easy. Handing back fifty processed images is where most browser tools reach for a dependency — typically JSZip, pulled from a CDN. That works, but it means the tool is not truly offline: block the CDN, or lose your connection at the wrong moment, and bulk export breaks.
A ZIP file is a well-documented container format, and the simplest valid variant is not hard to produce by hand. Each entry gets a local file header (a magic number, the CRC-32 checksum of the data, the compressed and uncompressed lengths, the filename), followed by the raw file bytes. After all entries comes a central directory that repeats that metadata plus the byte offset of each entry, and finally an end-of-central-directory record that says how many entries exist and where the directory starts. Write those structures into an ArrayBuffer with a DataView, wrap it in a Blob, and the browser will download a file that Windows Explorer, Finder, and 7-Zip all open without complaint.
The one design decision worth explaining is compression. ZIP supports a “stored” method, meaning the file bytes go in untouched, and a “deflate” method, which compresses them. Implementing deflate by hand is a serious undertaking — and for this use case, entirely pointless. JPEG, PNG, and WebP are already compressed formats. Running them through deflate typically saves under 2% while burning significant CPU time. Stored mode gives you a perfectly valid archive, opens everywhere, and costs nothing to implement. The only mandatory piece of real work is the CRC-32 checksum, which is about fifteen lines of code and a lookup table; get it wrong and every unzip utility on earth will reject the archive as corrupt.
🟡 The Honest Trade-Offs
Client-side processing is not free of downsides, and any article that pretends otherwise is selling something.
- 🔵 Memory is your device’s memory. A server can stream a 200 MB TIFF. A browser tab holding thirty large photos as decoded bitmaps can exhaust RAM on a modest laptop or phone. Processing files sequentially rather than in parallel mitigates this, but the ceiling is real.
- 🟠 Encoder quality is the browser’s, not yours.
toDataURL()uses whatever JPEG and WebP encoders the browser ships. They are good, but a server running a tuned encoder like MozJPEG can squeeze out meaningfully smaller files at the same visual quality. You trade a few percent of compression efficiency for the privacy guarantee. - 🟣 Heavy work blocks the UI. A per-pixel loop over a 24-megapixel image runs on the main thread and will freeze the interface for a moment unless you move it to a Web Worker or break it into chunks. This is a solvable problem, but it is a problem you have to solve; a server-side tool never has it.
- 🔵 No AI models for free. Sophisticated operations — true subject segmentation, generative inpainting, upscaling — need trained models. Running those in-browser is possible via WebAssembly, but it means shipping tens of megabytes of weights to the user. Simple colour-based operations cost nothing; intelligent ones cost a lot.
The reasonable conclusion is not “client-side always wins.” It is that for the overwhelmingly common tasks — resize, crop, compress, convert format, add a watermark — the browser is entirely capable, and in those cases there is no defensible reason to send someone’s files to a server at all.
🟢 Why WebP Is Usually the Right Output
Once the pipeline works, the remaining question is what to encode to. WebP typically produces files 25–35% smaller than JPEG at comparable visual quality, and unlike JPEG it also supports transparency, which means it can replace PNG for many graphics as well. Browser support has been universal for years. The web.dev guide to serving WebP images covers the performance case in detail.
The practical rule that falls out of all of this: resize first, then compress. Cutting a 4000px-wide photo down to 1200px removes roughly 90% of the pixels, which dominates any saving you get from nudging the quality slider. Quality is the fine adjustment; dimensions are the coarse one, and people reach for them in the wrong order surprisingly often.
You can see all of this working in the Advanced Image Studio Pro — Canvas transforms, per-pixel chroma keying, and the hand-rolled ZIP encoder, running entirely in your tab with no external libraries. For photographs with complex backgrounds where colour-keying cannot work, the AI Image Eraser handles segmentation instead, and the rest of the offline toolset is indexed under free web tools by category.
Is client-side image editing genuinely private, or is that marketing?
It is verifiable. Open your browser’s DevTools, go to the Network tab, and process an image. If no request carries your file, it was not uploaded. You do not have to trust a privacy policy — you can watch the network yourself.
Why avoid libraries like JSZip or CropperJS?
Each CDN script is a third-party request, a point of failure if the CDN is blocked or slow, and a page-weight cost. For a tool whose entire selling point is working offline, depending on a remote script to complete a bulk export undermines the premise.
Does the browser’s WebP encoder match a server-side one?
Close, but not quite. A server running a tuned encoder can produce somewhat smaller files at the same quality. For web publishing the difference is usually a few percent — a fair price for never transmitting the file.
Why does chroma key fail on my outdoor photo?
Because it matches colour, not subjects. An outdoor background contains hundreds of colours, so no single target colour and tolerance can isolate it. That case needs a segmentation model, which is what an AI background remover provides.
Can a browser handle a very large image, like 50 megapixels?
Usually yes on a desktop, though it will be slow, and browsers do enforce a maximum canvas size that varies by platform (mobile Safari is the strictest). Extremely large images may fail to render at full resolution and are better downscaled first.
Why not compress the ZIP with deflate?
Because the contents are already compressed. Deflating JPEG or WebP files typically saves under 2% while adding real processing time and a lot of implementation complexity. A stored archive is valid, universally readable, and appropriate here.